Overview
eGEO Compass is a small piece of software turning an Adndoid based smartphone into a DIGITAL GEOLOGICAL COMPASS.
eGEO Compass can be used to acquire orientation of geological surfaces such as bedding surfaces or fault planes.
The software relies on three sensors usually available on any android based device: GPS antenna, accelerometer and magnetic field sensor. Through dynamically acquiring data from these sensors it computes:
- Dip Azimuth
- Dip Angle
- Lat/Lon coordinates in WGS84 coordinate reference system
These three values are stored into an internal database from wich they can be:
- Viewed and added with an annotation
- Plotted on a map with undelying satellite imagery from Google Maps
- Exported in CSV format and erased
Usage
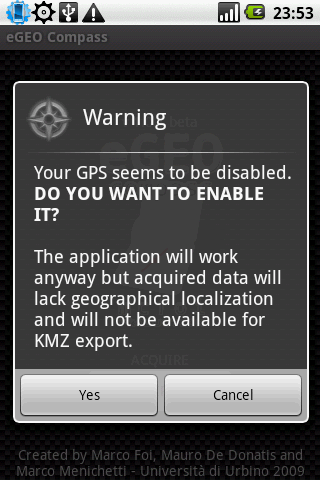
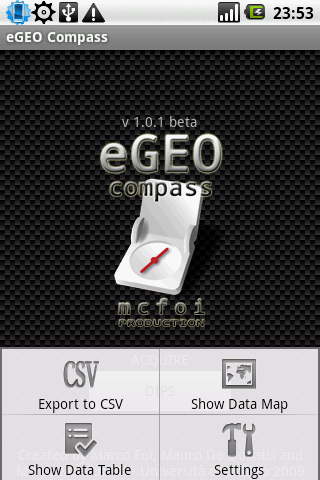
The application starts with the following screen and automatically checks for the availability of all required hardware.
In case it detects a turned-off GPS antenna it asks if the user wants to turn it on. eGEO Compass can work without GPS connection but all captured measurements will have coordinates of 0° lat/ 0° lon and, consequently, will be plotted somwhere in the Atlantic Ocean in the "Show Data Map" mode.

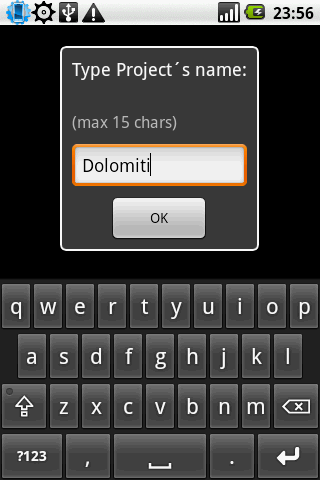
When the "DIPS" button is pressed a working session is started and the software will ask for a Project name: the short string inserted by the user will be stored with any measurement acquired during the following usage session (that is untill the user goes back to the starting screen or closes the application).
To reduce the need of typing, when a new working session is started, the "Project Name" dialog will be filled with the last inserted one.
The Project string will be used to filter data somewhere else in eGEO Compass and will be avalilable in the CSV exported file for easy data management.
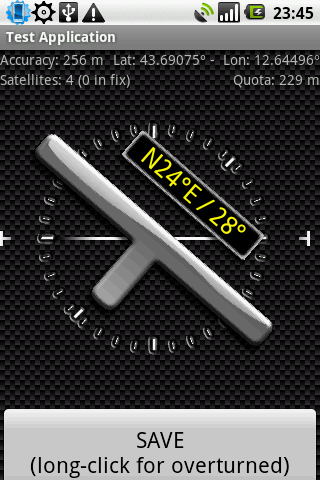
Once in the "DIPs Acquisition" screen the software is ready to capture data.
The usage of the software is very simple as no alignment or levelling is required: just place the device, lying it on the back cover, on the target surface... ..then simply press the "Save" button.
Whichever orientation is used, the software will compute the right values for the orientation of the chosen surface.
Long-pressing the "Save" button allows to record the data as referred to overturned strata. The difference can be seen in the "Show data table" mode.
!WARNING!
The magnetic sensor embedded in current devices is strongly affected by gradients.
As a consequence the software gives reliable data ONLY WHEN USED IN OPEN-AIR ENVIRONMENTS, far for metallic objects, electric fields and other magnetic fields (including those generated by magnetic rocks).
Data managing and Review
Saved measurement can be viewed, edited and exported in several ways: almost all options are available from the "Menu" in the starting screen.
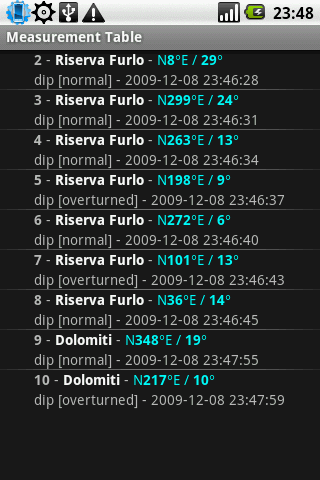
Show Data Table
"Show Data Table" displays a list of all captured data, sorted by acquisition date and time.
To erase all data go through the "Menu" button and select the "Delete measure archive"
Pressing on a row opens the editing mode.
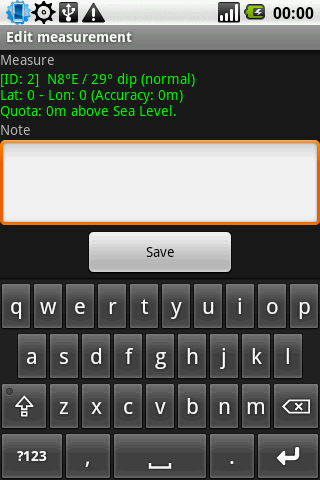
Edit mode
The editing mode currently only allows to add a text "Note" on the selected measure.
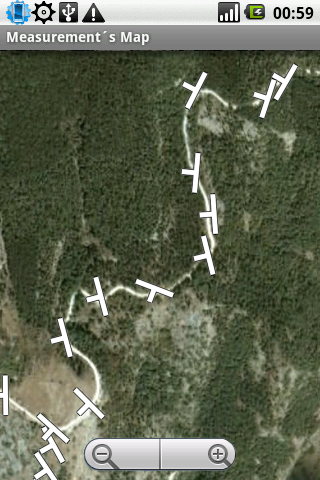
Show Data Map
"Show Data Map" displays data on a satellite map. This functionality relies on Google Maps and requires the avalilability of an internet connection. If no internet connection is avaliable, all data will be displayed on a gray background.
Upon opening this mode the user is asked which data to show on th map. A selection list is showed to allow for project filtering. A special "<All Projects>" option can be chosen to plot on the map all data in the database.
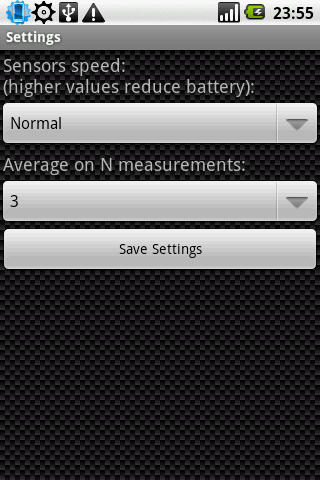
Settings
"Settings" allows the user to alter a couple of relevant software settings:
- Sensors speed: contrlos the delay between two subsequent readings of the sensors output. Mind: the shorter the time, the better the responsiveness... ...but the bigger the payload on the battery will be!
- Average on N measurements: sets the number of sensor readings used to compute the dislpayed value for Dip Azimuth and Dip Angle. The higher the number of readings, the more stable the displayed number will be.... ...but the slower the responsiveness will be.
Default and recommended settings are:
Sensor speed: normal
Average: 3 readings
Do not forget to press [Save Setting] on exit!!